The MAX30102 pulse oximeter
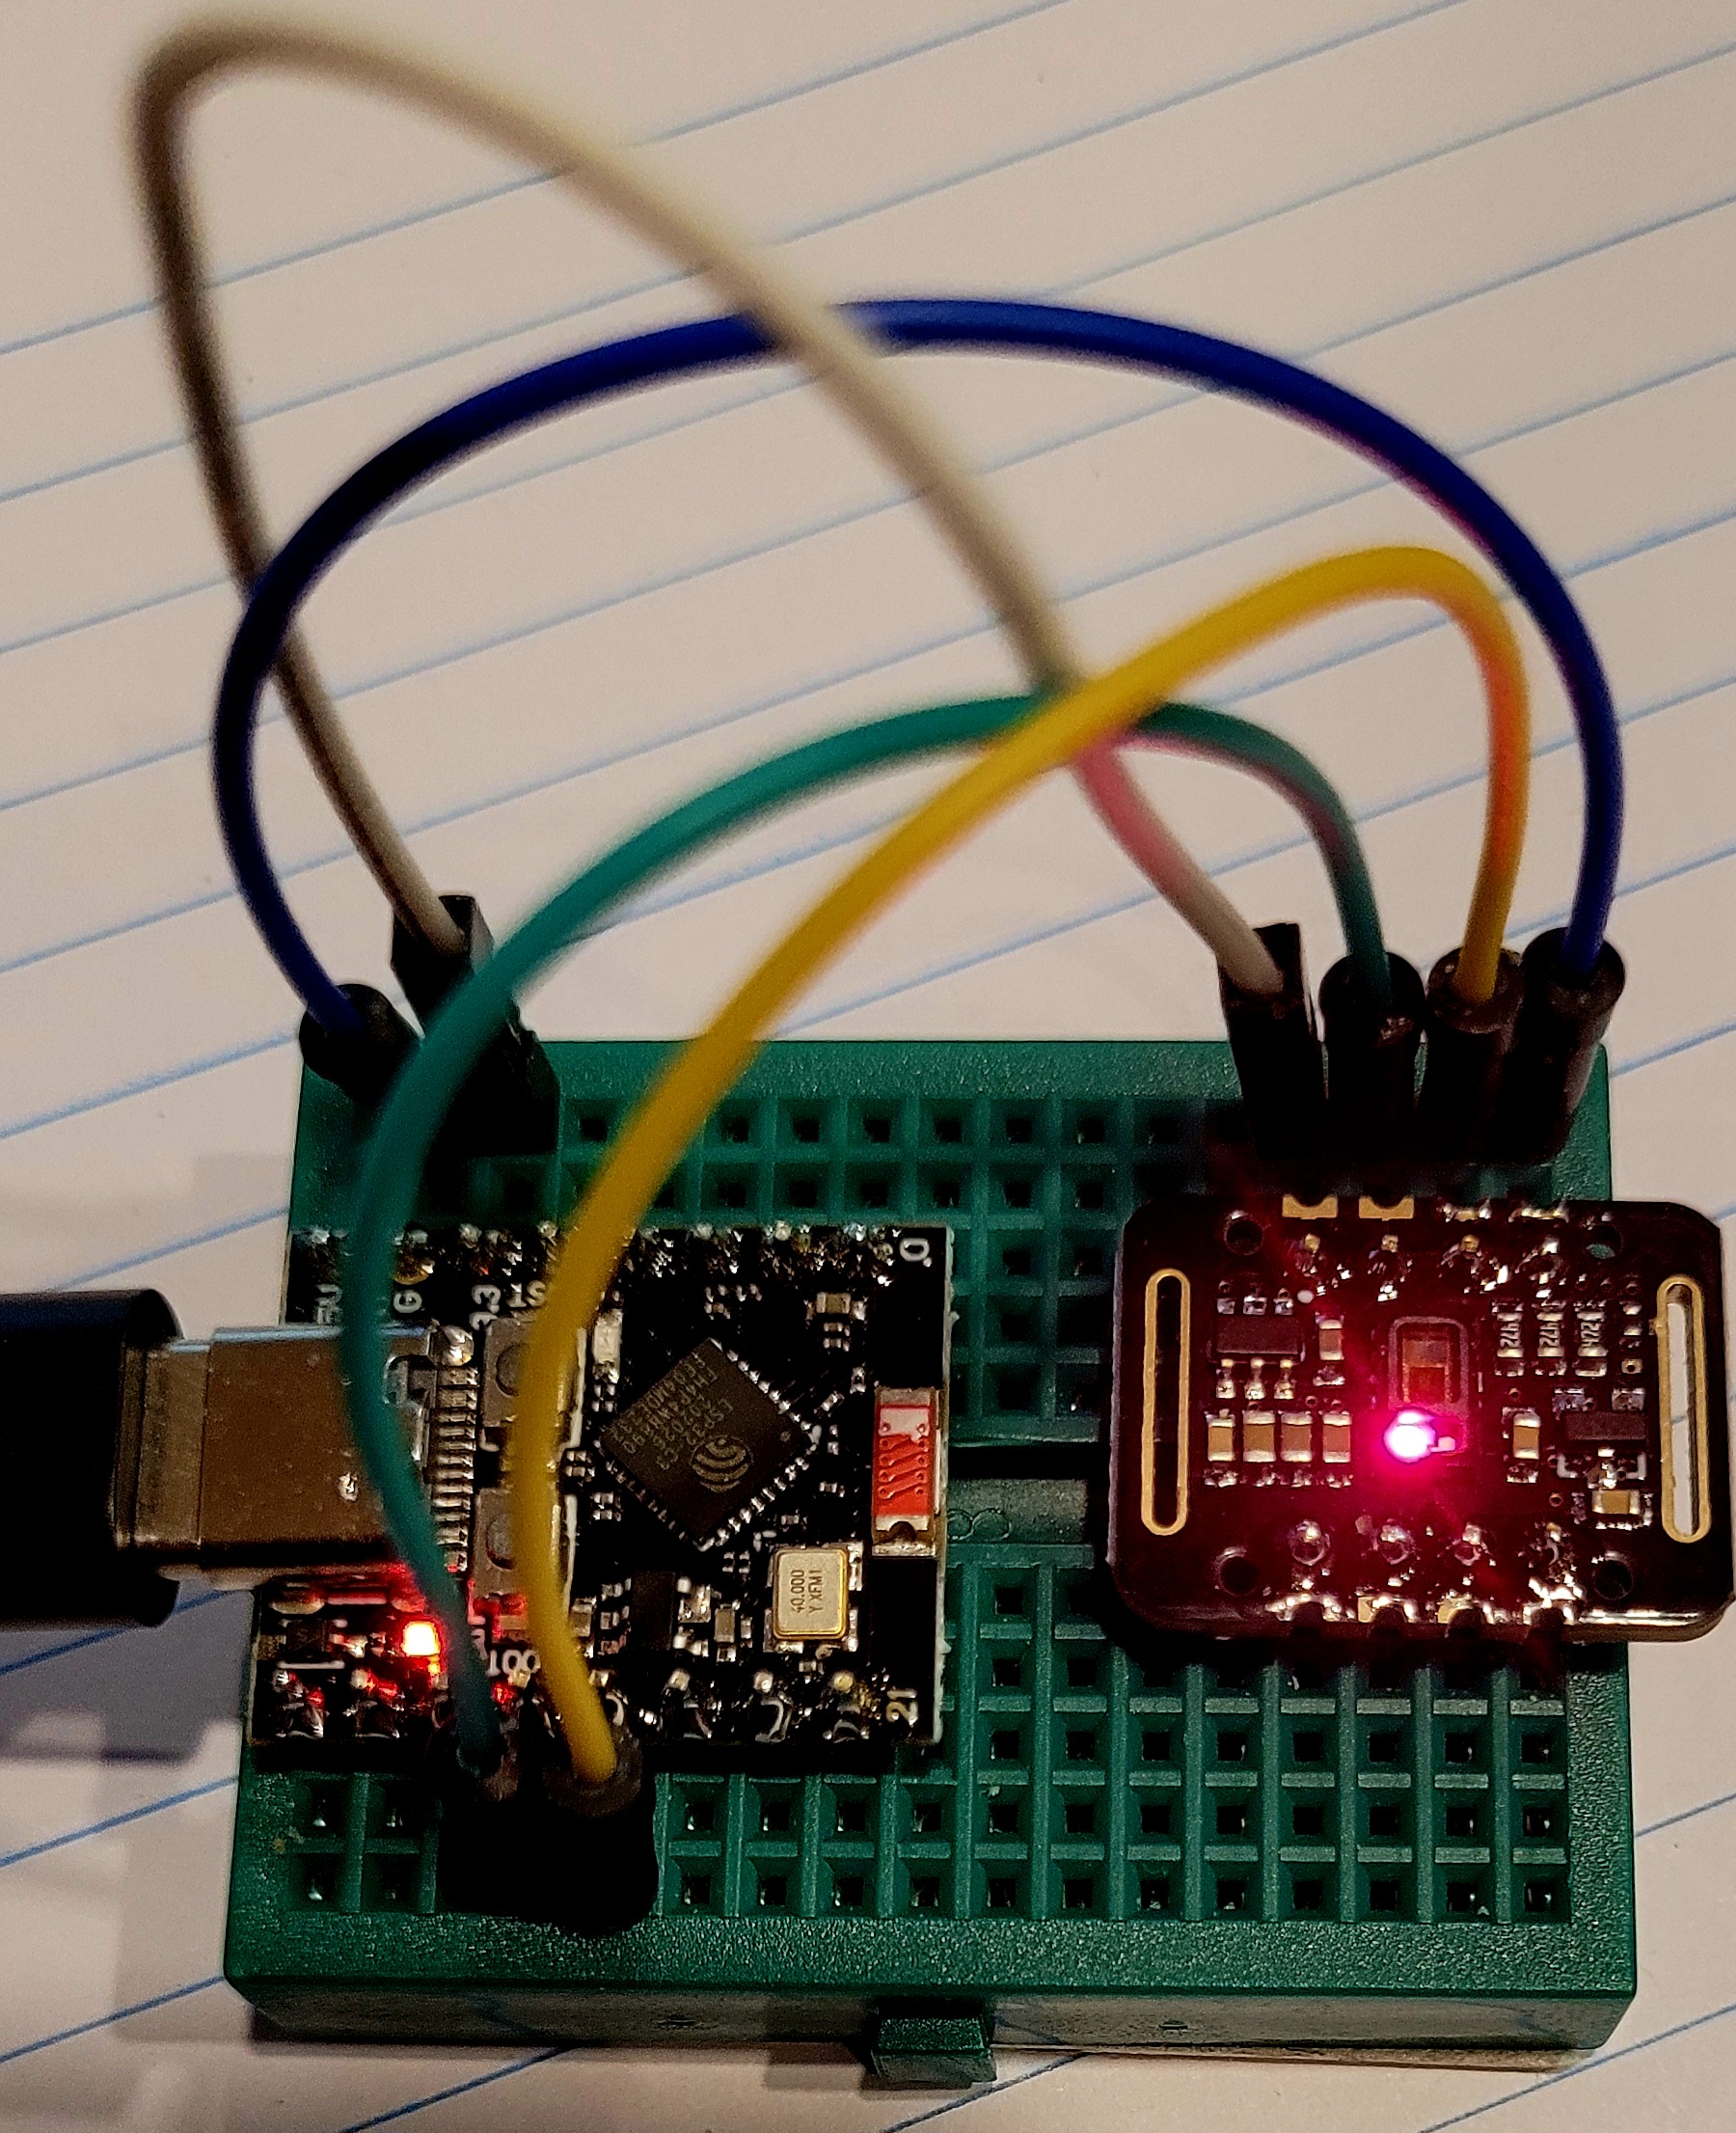
I have been thinking about a small simple pulse and spo2 measuring device that would collect and save the data. This thinking came about after I spent a night with my finger connected to a device with a wire that went to a device the size of a small purse.
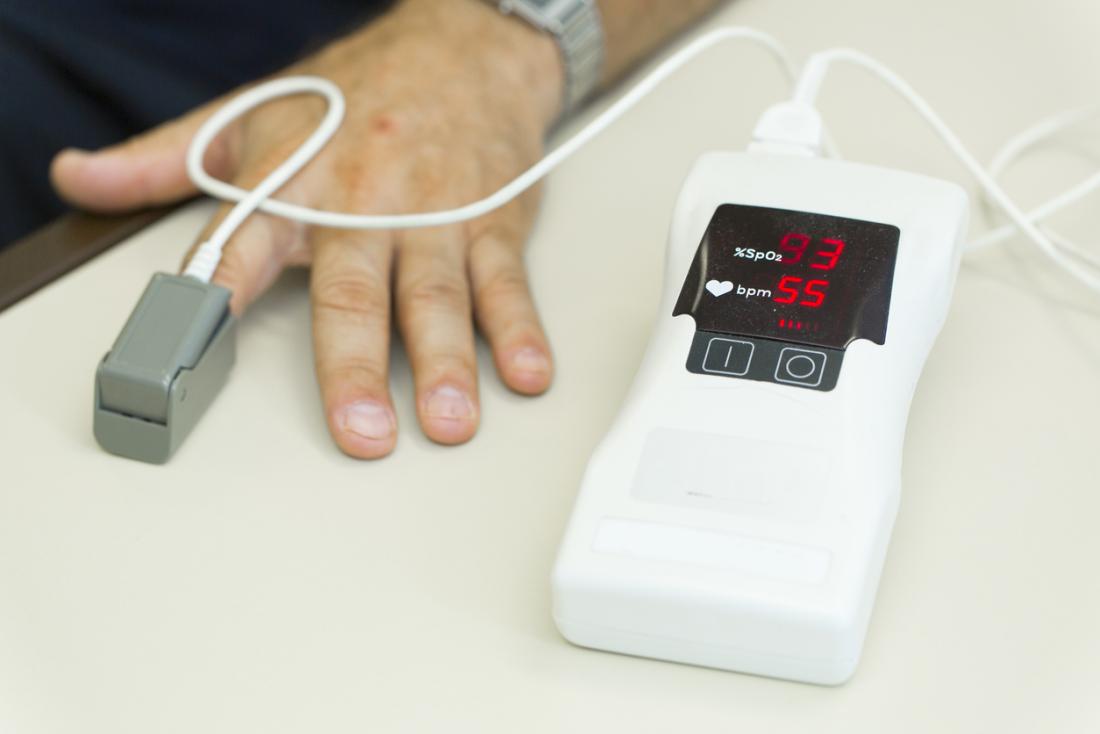
No rolling over or the whole thing came apart. Who thinks about that when they are sleeping. I figured something that just fit on the finger and uploaded the data to an appropriate place on the cloud would be useful. So now I mostly have it. Or at least a crude prototype.
After Gordo's presentation on build a "radar" display using ADSB data and mostly programed by Claude (https://claude.com/) I figured I try Claude.
Claude writeup starts.
How it works, how to wire it, which settings matter, how to read the data, and how to save it to the cloud.
How the MAX30102 works
The chip packs a red LED (about 660 nm), an infrared LED (about 880 nm), a photodiode and an 18-bit ADC into one small module. It works in reflection: you rest a fingertip on it, the LEDs shine into the skin, and the photodiode measures how much light bounces back. The method is called photoplethysmography (PPG).
- Pulse: each heartbeat briefly increases blood volume in the fingertip. More blood absorbs more light, so the reflected IR dips slightly with each beat. That is why the code inverts the signal before looking for peaks.
- Oxygen (SpO2): oxygenated and deoxygenated hemoglobin absorb red and infrared light in different proportions. Comparing the pulse ripple in red against the ripple in IR gives an estimate of oxygen saturation.
- Built-in help: the chip does ambient-light cancellation, averages samples for you, and buffers up to 32 samples in a FIFO so your code can read in bursts instead of in real time.
Hooking it up
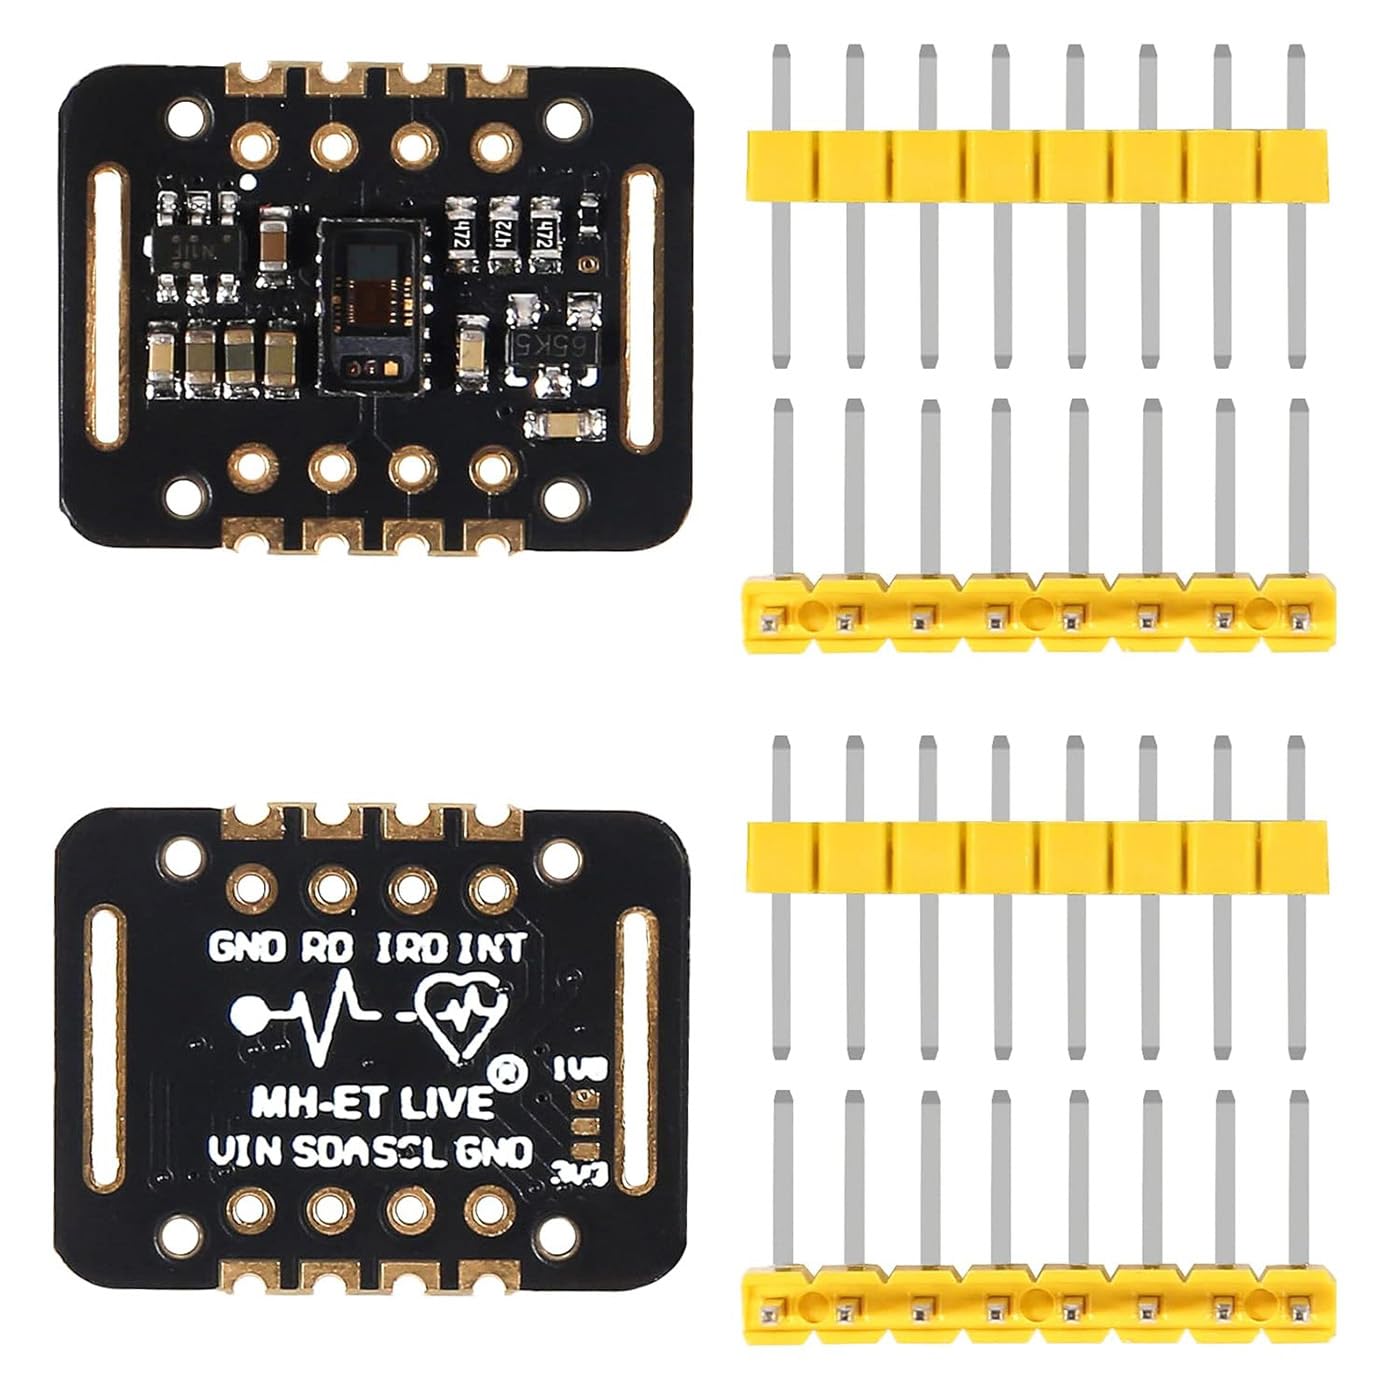
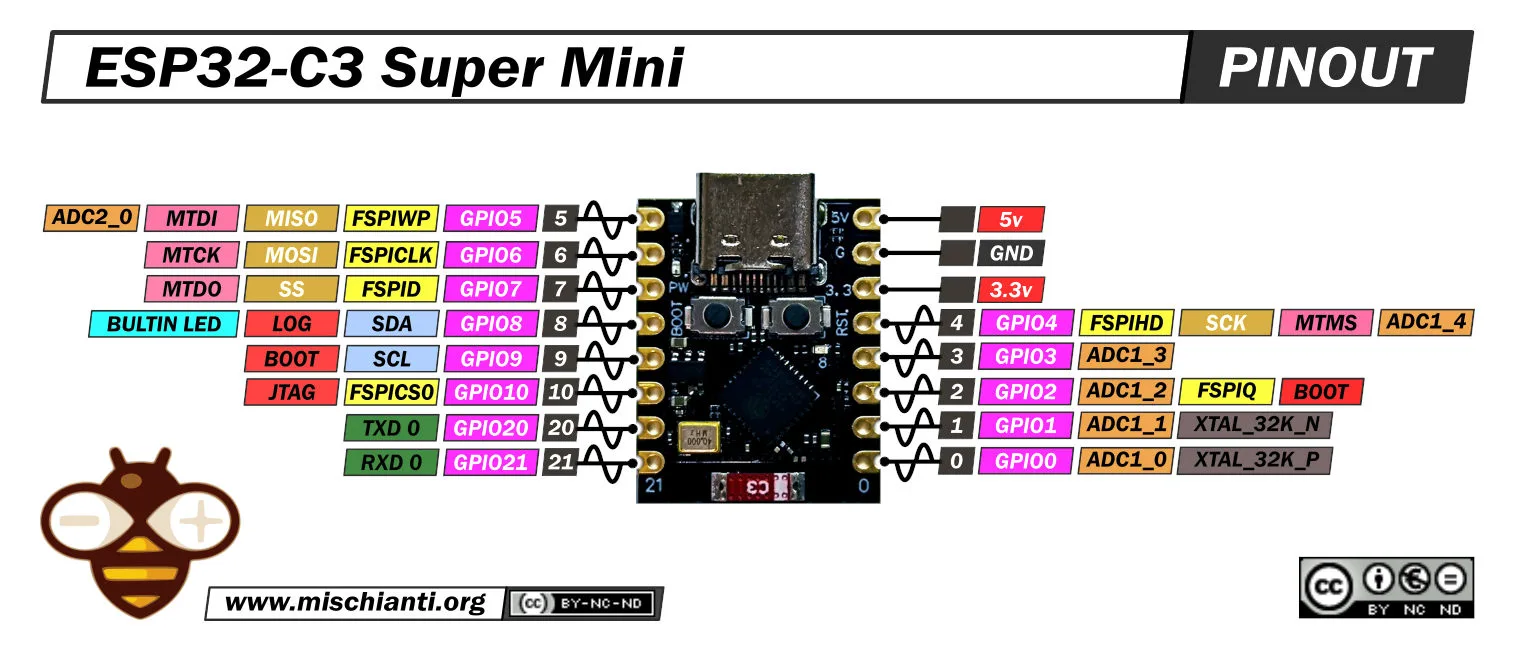
Use 3.3 V, SDA to GPIO 8, SCL to GPIO 9, and GND to GND. INT is
optional. After wiring, run i2c.scan(). You should
see address 0x57 (decimal 87). If nothing shows
up, check the wiring first and then the pull-ups. Some cheap
clone boards have unusual pull-up arrangements, and a few have
wiring quirks, so a second board is a useful check.
I
For physical setup, keep ambient light off the sensor, hold the
finger still, and use light, steady contact. A rubber band or
velcro strap works better than holding it by hand.
Use i2c.scan()
Scanning I2C bus...
Found 1 device(s):
Decimal: 87 | Hexadecimal: 0x57
Working it: the settings that matter
| Setting | Effect | Tradeoff |
|---|---|---|
| LED current | Signal strength | Too low gives a noisy signal, too high saturates the ADC at 262143 |
| Sample rate | Time resolution | Higher rates use more power and more data |
| Averaging | Noise reduction | Lowers the effective rate |
| Pulse width | Resolution, from 15 to 18 bits | Wider pulses mean longer LED-on time |
| ADC range | Headroom | Larger ranges are coarser |
The driver defaults to 100 Hz effective with 18-bit samples, which is plenty for heart rate. A good tuning check is to print raw IR with a finger on the sensor. You want a DC level well below 262143, usually somewhere between 30,000 and 200,000 depending on your finger and LED current.
Understanding the data
Each sample is a pair of raw ADC counts (red, IR) from 0 to 262143. They have two parts:
- DC component: the large, slow-changing baseline from skin, tissue and bone, which depends on contact pressure and LED current. A reading below roughly 30,000 means no finger, and one pinned at 262143 means saturation.
- AC component: the tiny ripple from the pulse, typically about 0.1% to 2% of the DC level. This is where heart rate and SpO2 come from.
For BPM, you find the time between ripple peaks and compute 60
÷ interval. For SpO2, you compute R = (AC_red ÷ DC_red) ÷
(AC_IR ÷ DC_IR). R is typically around 0.4 to 1.0,
which maps to roughly 100% down to 85% with the linear formula
in the code.
Calibration: that linear formula is a textbook approximation. Real devices calibrate against reference oximeters, so treat the numbers as hobby-grade trends.
Motion: movement is the biggest source of garbage readings, so discard BPM values that jump suddenly.
Saving data to the cloud
The ESP32-S3 makes it easy because it has built-in Wi-Fi. The main design choice is to send summaries, not raw samples. Pushing 100 samples a second to a cloud service is wasteful, so send BPM and SpO2 every few seconds, or batch raw data into a file for occasional upload.
Common options, from simplest to most flexible:
- ThingSpeak or Adafruit IO: a simple HTTP POST or MQTT publish, with free tiers and built-in charts.
- Google Sheets: a small Apps Script web app that appends rows when your board POSTs to it. This is good for logging and sharing.
- MQTT broker (HiveMQ, AWS IoT, Home Assistant):
best if you want live dashboards or alerts, using
umqtt.simplein MicroPython. - InfluxDB Cloud with Grafana: best for time-series graphs and long-term storage.
- Or, to a PHP script.
The Python code, explained
A walk throughmax30102.py (the sensor driver,
signal processing and basic demo) and php_upload.py
(the Wi-Fi uploader that builds on it).
Part 1: max30102.py (the basic example)
This file has three parts: the MAX30102 class
that talks to the chip, the HeartRateMonitor
class that does the math, and a main() demo.
Settings and register addresses
SDA_PIN = 8
SCL_PIN = 9
_ADDR = 0x57
_REG_FIFO_DATA = 0x07
...
The chip is controlled by reading and writing numbered
registers over I2C. The names at the top (_REG_FIFO_CONFIG,
_REG_MODE_CONFIG, and so on) give those numbers
readable labels. The leading underscore marks them as
internal. 0x57 is the chip's fixed I2C address,
and 0xFF is its part-ID register, which should
contain 0x15.
The MAX30102 class
__init__ does three safety
steps before using the chip:
i2c.scan()confirms something answers at0x57, otherwise it raises "not found, check wiring".- It reads the part ID and checks it equals
0x15, which catches a wrong or damaged chip. - It calls
reset()and thensetup().
_read and _write
are small helpers for reading or writing one register byte, so
the rest of the code isn't full of I2C details.
reset() writes 0x40
to the mode register, which restarts the chip. It then checks
every 10 ms (for up to 200 ms) until that reset bit clears
itself, which signals the chip is ready.
setup() is the heart of the
configuration:
- Interrupts off: the two interrupt-enable registers are set to 0, since the code polls instead.
- FIFO config:
(0b010 << 5) |
              0x10 | 0x0F
packs three settings into one byte: average 4 samples together, let the buffer overwrite old data when full ("rollover"), and a threshold setting for the almost-full flag. - Mode
0x03: SpO2 mode, which turns on both the red and IR LEDs. - SpO2 config:
(0b01 << 5) |
              (0b011 << 2) | 0b11
is ADC range 4096 nA, 400 samples per second, and a 411 µs pulse width, which gives 18-bit resolution. Averaging 4 samples gives the effective 100 Hz rate used everywhere else. - LED currents: both LED amplitude
registers get
led_current, so0x24is about 7 mA. A bigger number means brighter LEDs and a stronger signal. - Finally it clears the FIFO so you start with no stale data.
clear_fifo() sets the write
pointer, overflow counter and read pointer to zero. php_upload.py
calls this after each upload.
shutdown() and wakeup()
put the chip into low-power mode and back.
read_fifo() is the most
important method:
- It reads the FIFO write pointer and read pointer.
(wr - rd) & 0x1Fgives how many samples are waiting. The& 0x1Fwraps the answer to 0 to 31, because the pointers count around a 32-slot circle.- It reads all waiting samples at once with a single I2C
call of
n * 6bytes, which is much faster than one read per byte. - Each sample is 6 bytes: 3 for red, then 3 for IR. The code
joins each 3-byte group into a number with bit shifts (
(b0
              << 16) | (b1 << 8) | b2
), then masks with0x3FFFFto keep only 18 bits. - It returns a list of
(red, ir)tuples.
One quirk: if the buffer completely fills, the two pointers become equal and the count reads as zero. Polling every 20 ms, as the demo does, keeps the buffer from ever getting full.
read_temperature() triggers a
one-off reading of the chip's own temperature, waits for it to
finish, and combines the whole-degree register with the
fraction register (each step is 0.0625 °C). It's the chip's
temperature, not your body temperature.
The HeartRateMonitor class
It receives one (red, ir) pair at a time
through update() and keeps a running BPM and
SpO2. The constants are FS = 100 (samples per
second), FINGER_THRESHOLD = 30000 (an IR reading
below that means no finger), and WIN = 200 (a
2-second window for SpO2).
update(red, ir), step by step
- Count samples.
self.nis a sample counter, used as a clock (at 100 Hz, 100 counts is one second). - Finger check. If IR is below the
threshold, it calls
reset(), which wipes all state including the BPM and SpO2 values, and returnsFalse. That is why readings drop to zero when you lift your finger. - Track the DC level.
dc_iranddc_redare slow-moving averages of the signal. Each update moves them 2% of the way toward the new value. That tracks the large steady baseline while ignoring the fast pulse ripple. - Extract the pulse.
ac = -(ir -
              dc_ir)
subtracts the baseline, leaving the ripple, and the minus sign inverts it so that a heartbeat becomes an upward peak. Thenself.smis a low-pass filter: it moves 25% toward each newacvalue, which smooths out fast noise above roughly 5 Hz. - Fill the SpO2 buffers. Raw red and IR
values are appended to two lists. When they exceed 200
samples, the oldest is dropped, and every 50 samples
_calc_spo2()runs. - Track the signal size.
self.ampfollows the biggest recent ripple: it jumps up to a new maximum but decays by 0.5% per sample otherwise. This lets the threshold adapt if your signal gets stronger or weaker. - Detect a peak. The code looks at the
previous sample (
prev1) and asks whether it was a local maximum: higher than the sample before (prev2), at least as high as the current one, bigger than 40% of the recent amplitude, and the amplitude itself above 20 (so noise isn't mistaken for a pulse). - Reject false peaks.
gapis the number of samples since the last peak. It must exceed0.3 * FS(30 samples, which caps heart rate at 200 BPM). If the last peak was also recent (under 1.5 seconds ago), the gap is stored as an interval, and only the latest 5 are kept. - Compute BPM. The average interval gives
60
              * FS / avg
beats per minute. It's accepted only if it falls between 40 and 180. The first peak after a reset has no previous peak to compare with, so it only sets the starting point. - Shift the history.
prev2andprev1move forward for the next sample, and the function returnsTrueif a beat was found.
_calc_spo2()
This takes the last 2 seconds of raw data:
mean_irandmean_redare the DC levels.ac_irandac_redare the root-mean-square deviations from those means, which measure the size of the pulse ripple.r = (ac_red / mean_red) / (ac_ir / mean_ir)is the "ratio of ratios".spo2 = 110 - 25 * ris the rough linear formula.
If the result is between 70 and 100 it's accepted, and smoothed (70% old value, 30% new) so the display doesn't jump. Above 100 is clamped to 100, and anything below 70 is ignored as noise. The formula is a textbook approximation, not a calibrated medical one.
The finger property simply returns whether dc_ir
> 0, meaning the monitor has seen a finger since
the last reset.
The main() demo
This is the basic example. It:
- Creates the I2C bus and prints what it found on it.
- Creates the sensor and prints the die temperature.
- Loops forever, feeding every FIFO sample into
hrm.update(), and once a second prints either "No finger detected" or the current BPM and SpO2 (showing--when a value isn't ready yet). - Sleeps 20 ms per pass, comfortably inside the roughly 320 ms the 32-sample FIFO can hold.
The if __name__ == "__main__": main() line
means the demo runs only when you run the file directly. When
another file imports it, as php_upload.py does,
the demo stays quiet.
Part 2: php_upload.py (the uploader)
It reuses everything above and adds Wi-Fi and the upload. It
doesn't repeat the sensor code. It imports MAX30102,
HeartRateMonitor, SDA_PIN and SCL_PIN
from max30102.py.
Settings and wifi_connect()
The capitalized variables are the ones you edit: Wi-Fi name
and password, SERVER_URL, SECRET,
and the two timers (store a reading every 5 seconds, upload
every 30).
wifi_connect() switches the ESP32 into station
mode, starts connecting, and waits up to 20 seconds, polling
every 250 ms. It raises an error on timeout rather than
hanging, and returns the wlan object so the main
loop can check the connection later.
The PhpLogger class
add(bpm, spo2) saves a reading
as (ticks_ms, bpm, spo2). ticks_ms()
is milliseconds since boot, because the board doesn't know the
real time. The buffer is capped at 400 entries, dropping the
oldest, so a long server outage can't use up memory.
flush() sends the batch:
- It returns right away if there's nothing stored.
- It records
nowand builds one text line per reading:"%.1f,%d,%d", meaning how many seconds ago it was taken, then BPM, then SpO2.ticks_diffis used for the subtraction because the tick counter eventually wraps around. The lines are joined with newlines into the request body. gc.collect()frees memory before the network call.requests.post(self.url + "?key=" + self.key, data=body)sends it, with your secret in the URL. The status code and reply text are saved, thenr.close()releases the connection.- A
try/exceptcatches network failures, prints the error, and returnsFalsewith the buffer untouched, so those readings are retried next time. - A
200status means the server accepted the data, so the buffer is cleared. Any other status leaves the buffer and prints what the server said, which helps you spot a403(wrong secret).
test_upload() connects to Wi-Fi
and sends one fake reading of 72 BPM and 98%. It checks your
Wi-Fi, URL and secret without involving the sensor.
main()
Setup: it creates the I2C bus, the sensor,
the HeartRateMonitor, the Wi-Fi connection and
the logger, and records two timestamps, t_log
and t_up.
Each pass of the loop:
- Feed the monitor. All waiting FIFO
samples go to
hrm.update(), exactly as in the basic demo. - Store a reading every 5 seconds. It's saved only if a finger is detected and both BPM and SpO2 are non-zero. That filters out the settling period after you place your finger.
- Upload every 30 seconds. It checks the
Wi-Fi first and tries to reconnect if it dropped (catching
failure so the loop doesn't crash). If connected and there's
data,
log.flush()sends it. Then it callssensor.clear_fifo(), because the HTTP request takes a second or two and the sensor buffer overflows meanwhile, so clearing it discards the stale data. - Sleep 20 ms.
The final main() line makes the script run as
soon as it's imported or started, so comment it out when you
want to run test_upload() from the REPL.
How the two files fit together
The sensor produces red and IR samples at 100 Hz. MAX30102.read_fifo()
collects them, and HeartRateMonitor turns them
into a BPM and SpO2 estimate. php_upload.py
snapshots those estimates every 5 seconds and posts batches to
receive_simple.php, which appends them to readings.csv.
receive_simple.php, explained
The simplified receiver: no JSON, no database. The board sends plain text lines, and PHP appends them to a CSV file.The idea
The script has two jobs, chosen by the type of HTTP request:
- POST (from the board): read the lines of text in the request, convert each to a CSV row with a real timestamp, and append the rows to a file.
- Anything else (you opening the URL in a browser): show the contents of the file as plain text.
The board sends one line per reading in the form secondsAgo,bpm,spo2,
for example 25.0,72,98. The secret goes in the
URL as ?key=....
The constants
const SECRET = 'change-this-secret';
const FILE   = __DIR__ . '/../data/readings.csv';
SECRET must match the one in php_upload.py.
FILE is where the data goes. __DIR__
is the folder the script lives in, so __DIR__ .
'/../data/readings.csv' places the file one folder
up, outside the folder the web server shows to browsers.
That keeps the raw file from being fetched directly by
anyone who guesses its name.
The POST branch (receiving data)
This runs when $_SERVER['REQUEST_METHOD'] === 'POST'.
1. Check the secret.
if (!hash_equals(SECRET, (string) ($_GET['key'] ?? ''))) {
    http_response_code(403);
    exit('bad key');
}
$_GET['key'] reads the ?key=...
part of the URL. The ?? '' means "use an empty
string if it's missing", so a request with no key doesn't
cause an error. hash_equals compares the two
strings in constant time, which is a safer habit than ==.
If they don't match, the script replies with status 403
and stops, and the board prints "Server said HTTP 403".
2. Read the body.
$now  = time();
$body = file_get_contents('php://input', false, null, 0, 20000);
$out  = '';
time() is the server's current Unix time. It's
saved once so every line in the batch is timed against the
same moment. PHP's $_POST array only handles
form data, so plain text has to be read from the raw request
with php://input. The last argument, 20000,
caps the read at 20,000 bytes. The board holds at most 400
readings of about 12 bytes each, so a normal batch is far
smaller. $out starts as an empty string that
will collect the output.
3. Process each line.
foreach (explode("\n", trim($body)) as $line) {
    $p = explode(',', trim($line));
    if (count($p) !== 3 || !is_numeric($p[0]) || !is_numeric($p[1]) || !is_numeric($p[2])) {
        continue;
    }
    $out .= gmdate('Y-m-d H:i:s', $now - (int) round((float) $p[0]))
          . ',' . (int) $p[1] . ',' . (int) $p[2] . "\n";
}trim($body)removes stray whitespace at the ends, andexplode("\n", ...)splits the text into one string per line.- For each line,
explode(',', trim($line))splits it at the commas into three pieces: seconds ago, BPM and SpO2. - The
ifskips the line withcontinueif it doesn't have exactly three pieces or any piece isn't a number. One damaged line doesn't ruin the rest of the batch. - The board has no real-time clock, so the first value
says how long ago the reading was taken.
$now -
                round(seconds ago)
turns that into a real Unix timestamp, andgmdate('Y-m-d H:i:s', ...)formats it as a UTC date and time such as2026-10-18 14:02:11. - Casting BPM and SpO2 with
(int)removes any decimals and guarantees plain whole numbers go into the file. - The finished row, with a newline on the end, is added to
$outwith.=.
4. Make sure the folder exists.
if (!is_dir(dirname(FILE))) {
    mkdir(dirname(FILE), 0775, true);
}
dirname(FILE) is the data
folder. If it isn't there yet (the first run), mkdir
creates it. The true allows creating parent
folders too.
5. Add a header row on first write.
if (!file_exists(FILE)) {
    $out = "time_utc,bpm,spo2\n" . $out;
}
If the file doesn't exist yet, the column names are put in front of the first batch, so spreadsheet programs label the columns.
6. Append to the file.
file_put_contents(FILE, $out, FILE_APPEND | LOCK_EX);
echo 'ok';
exit;
file_put_contents writes the whole string in
one call. FILE_APPEND adds to the end of the
file instead of replacing it. LOCK_EX takes an
exclusive lock while writing, so if two requests ever arrive
at once their rows can't get mixed together. The script then
replies ok (status 200 by
default), which is what tells the board to clear its buffer,
and exit stops the script so the GET code
below doesn't run.
The GET branch (viewing data)
header('Content-Type: text/plain');
if (file_exists(FILE)) {
    readfile(FILE);
} else {
    echo "No readings yet.\n";
}
Any request that isn't a POST reaches this part. The header
tells the browser to show the response as plain text rather
than HTML. If the file exists, readfile sends
its contents straight to the browser, and otherwise the
script says there's nothing yet. You can also skip the
browser and open readings.csv directly in a
spreadsheet program.
A worked example
The board sends this request:
POST /receive_simple.php?key=change-this-secret

10.0,72,98
5.0,73,98
0.0,71,97
If the server receives it at 14:02:20 UTC, the script appends:
2026-10-18 14:02:10,72,98
2026-10-18 14:02:15,73,98
2026-10-18 14:02:20,71,97
and replies ok.
Things to know
The secret is in the URL. Web server logs often record URLs, so the key may appear in your access log. On your own network that's usually acceptable. Don't share log files.
- Viewing isn't protected. Anyone who can reach the URL in a browser can read the data. The secret only guards writing.
- Silent skipping. Malformed lines are dropped without an error, so if rows seem to be missing, check what the board is actually sending.
- No range check. This version doesn't reject implausible values, unlike the earlier JSON version, so a BPM of 500 would be stored if the board sent it.
- Plain HTTP. The key and readings travel unencrypted. That's fine on a home network, but use HTTPS behind a reverse proxy if you ever expose it to the internet.
- The file only grows. At one reading every 5 seconds that's about 17,000 lines a day, which is small, but you may want to rotate or archive it eventually.
CODE
Python MAX30102 Library
Python Upload Data
PHP on the host
Acknowledments
Thanks Claude!
And David for the MAX30102 sensor